")
")


INTRO
A few days back, I posted a writeup on an HTB OSINT challenge, if you remember correctly. I mentioned a tool named Spiderfoot. but we didn’t use it there. because there was no chance that we could find the flag with this flag. But it is my second best OSINT scanning tool. and obviously, the first one is Maltego.
This tool has a very awesome themed website. they provided user-friendly documentation. recently, Kali Linux has included Spiderfoot in his OSINT tools. it means you can install this tool with aptitude command in Kali Linux. But you can run it in some other Linux distributions.
INSTALLATION
If you are running Kali Linux like me, type this command:
apt update && apt install spiderfoot
But If you getting any problem with the aptitude package manager or you have some other Linux distribution then you can use the GitHub page. type this command:
git clone https://github.com/smicallef/spiderfoot.git
Go to the downloaded dir. and type this command to give python files executable permission:
chmod +x *.py
Now you can run the sf.py file in order to run it with a web-interface or with a command-line interface.
ATTACK
After installation, you can easily run this tool. I am using Kali Linux so I never installed it from GitHub. I used the default aptitude package manager to install it in my system.
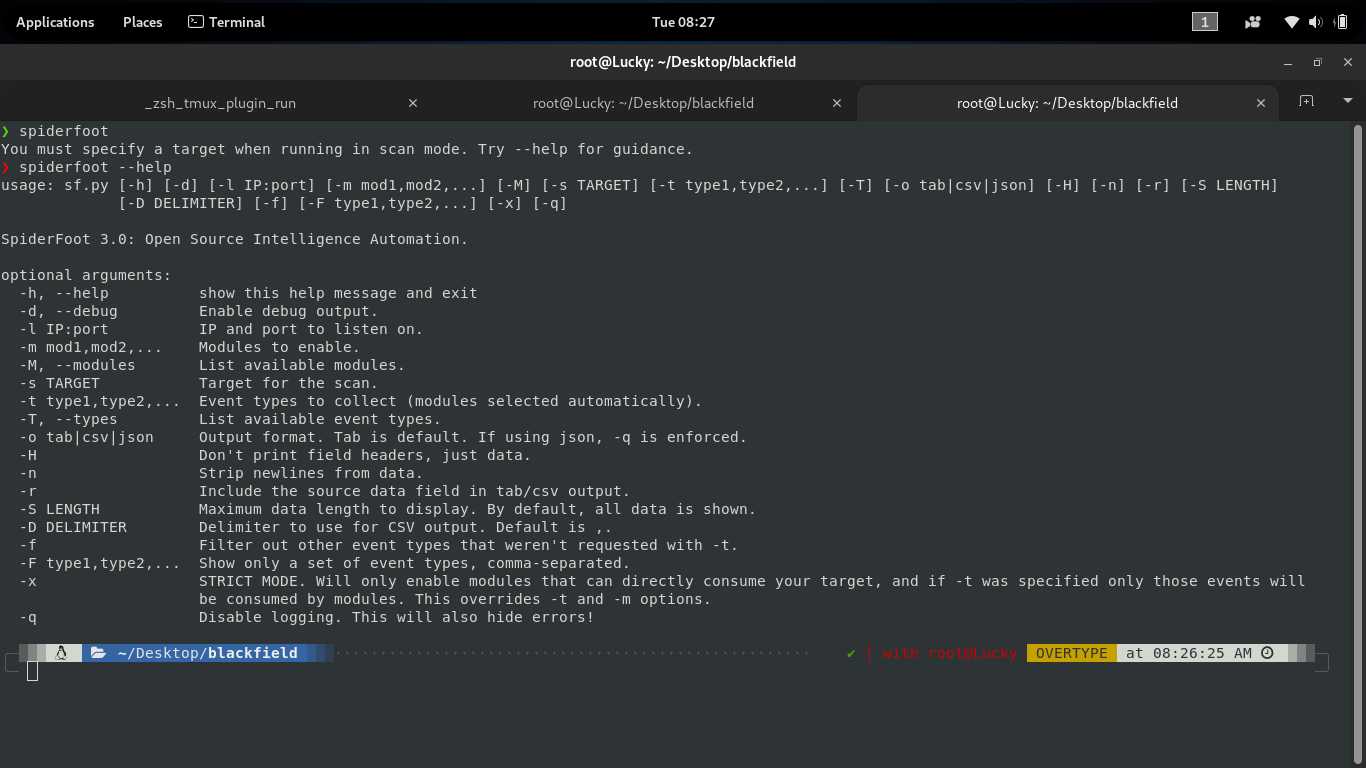
First, let’s see the help menu of this tool. type this command:
spiderfoot --help
Screenshot:
Note that you can use the same flags that I am going to use here with sf.py.
Now let’s look at the list of modules that comes with Spiderfoot. type this command:
spiderfoot -M
Screenshot:
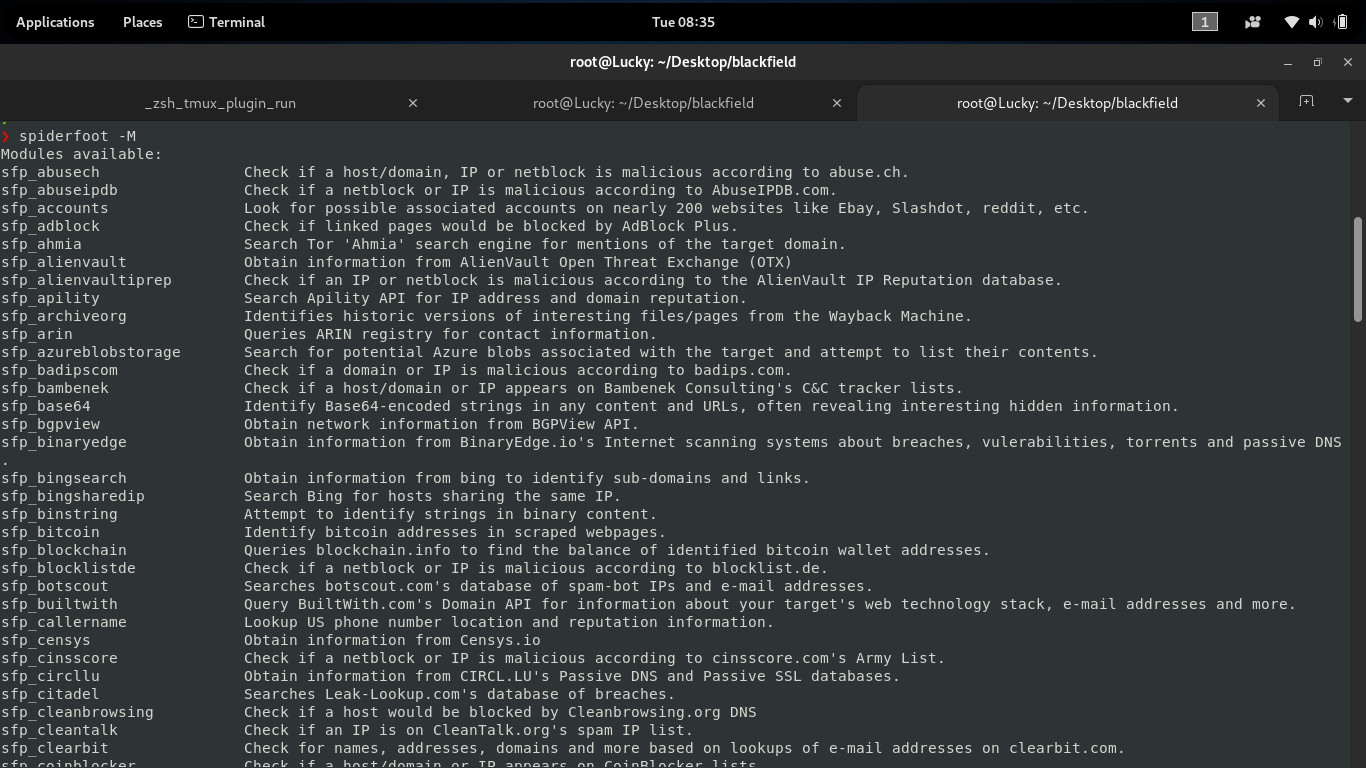
As you can see it has a lot of modules. and it shows us the reason to use this tool to extract any information.
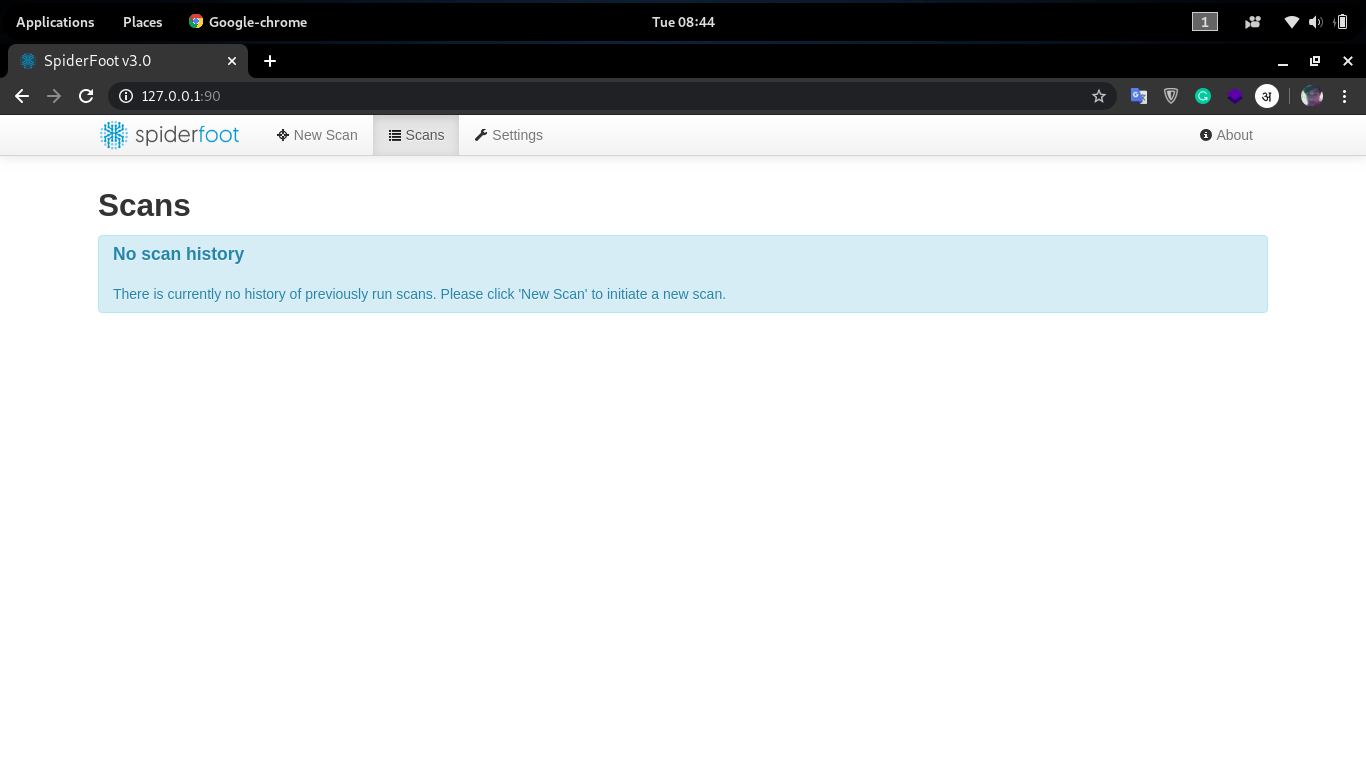
We can use this tool with a web-interface. type this command:
spiderfoot -l 127.0.0.1:90
-l stands for listening. then we have assigned an IP and a port to listen on. now you can go to 127.0.0.1:90 to use this tool.
Screenshot:
After that, go to the New Scan tab to start a scan. you can scan for a domain, IP address(ipv4, ipv6), subdomain, username, ASN, phone-number, email address.
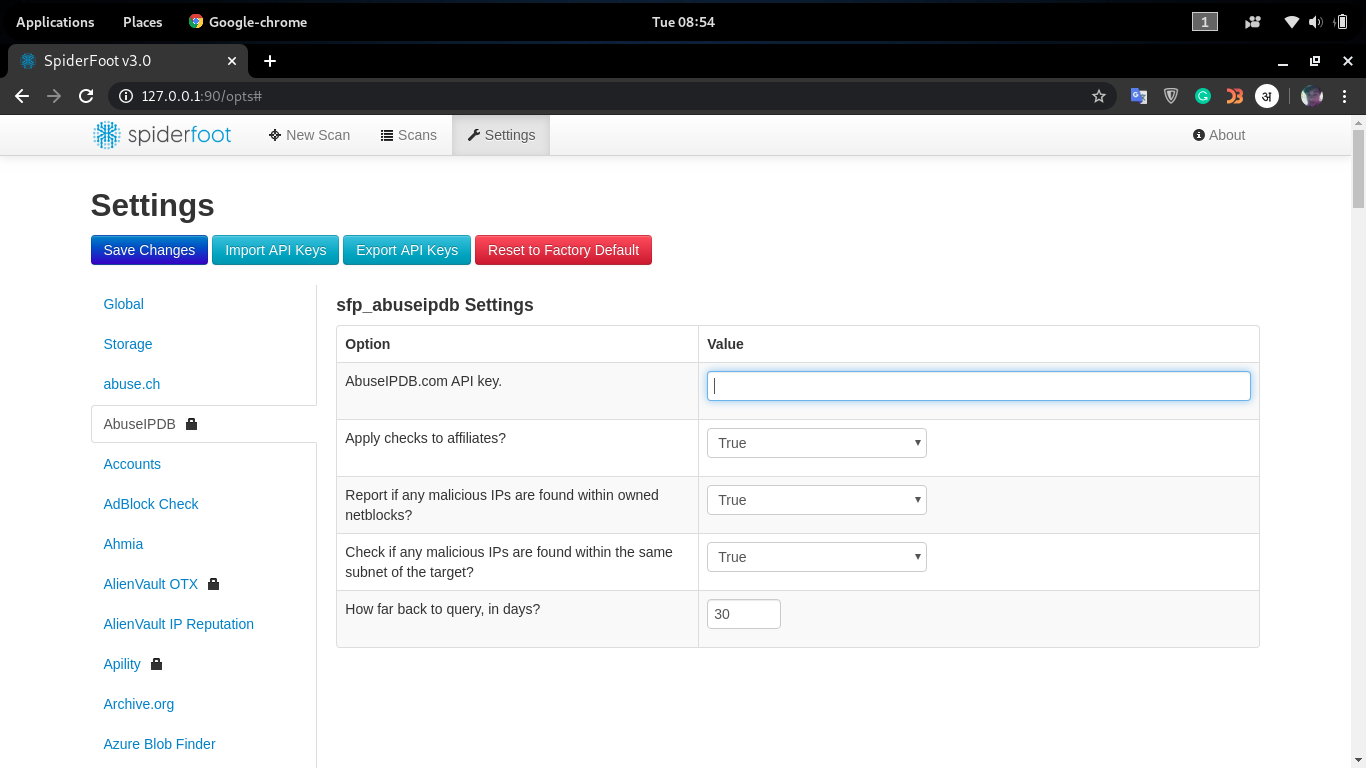
For demonstration, we can use perform a scan on our website. But before going further, look at the By Module tab. you will some lock icon there on some modules. it means that you can’t use that module if you haven’t set up the API key for that. you can set up API keys from the Setting tab.
Screenshot:
Now, let’s scan our website with this awesome tool.
Screenshot:
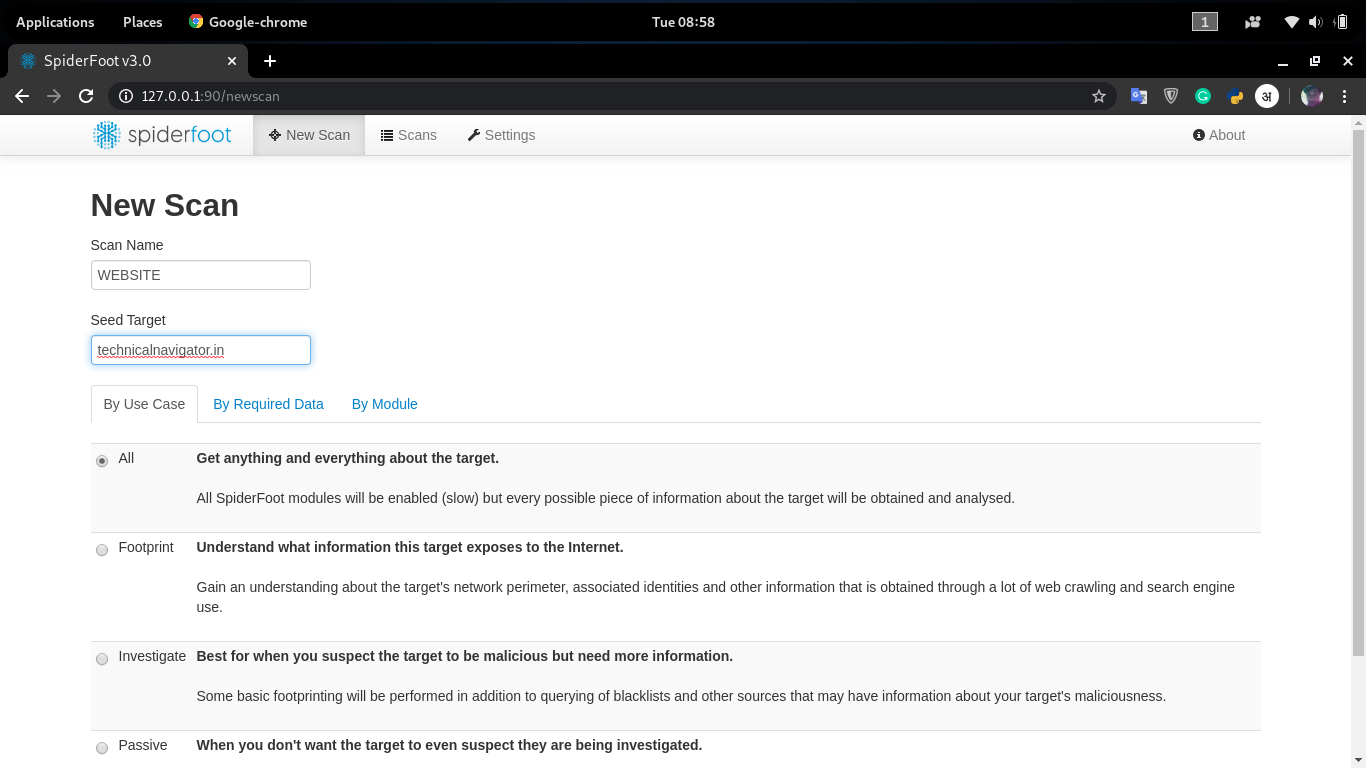
We want to see every piece of detail on our website. that’s why we have selected All(By use case). this process can take some time. It all depends on your internet speed.
Screenshot:
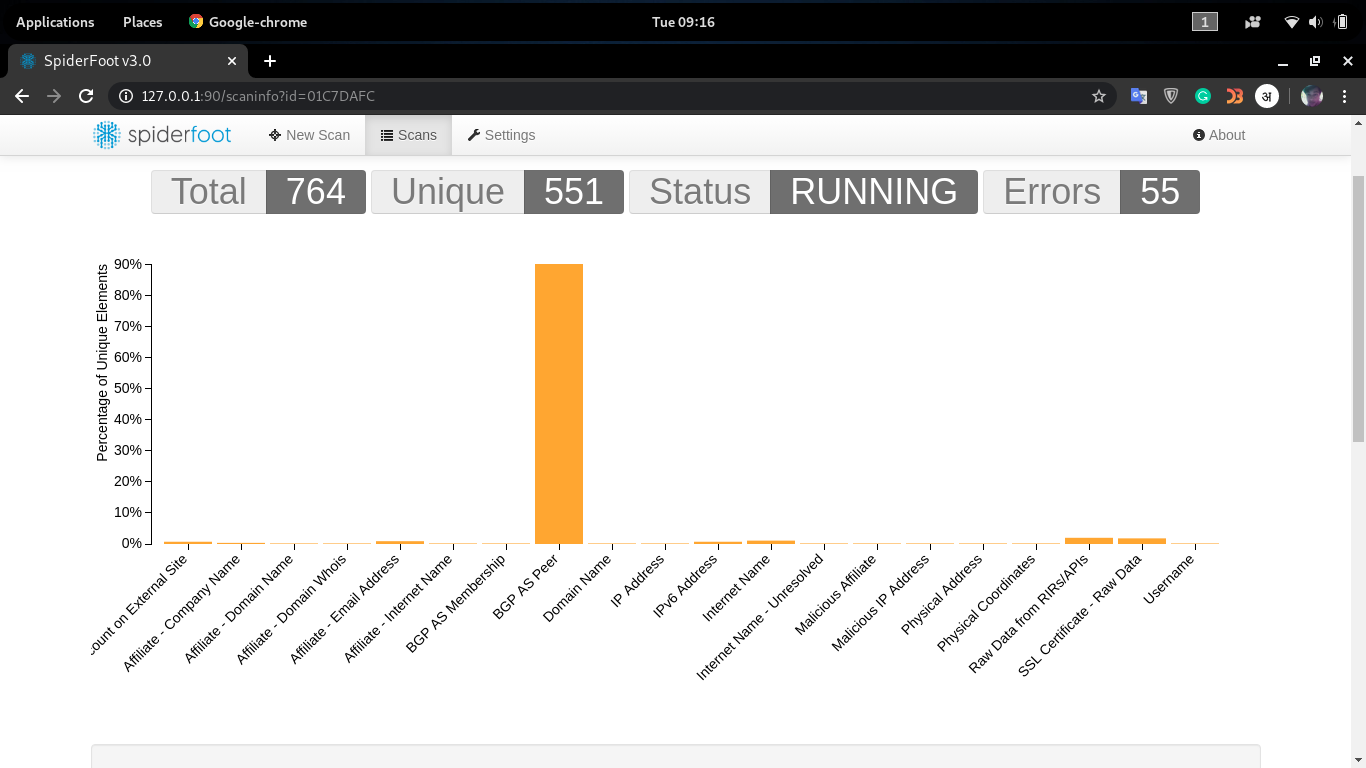
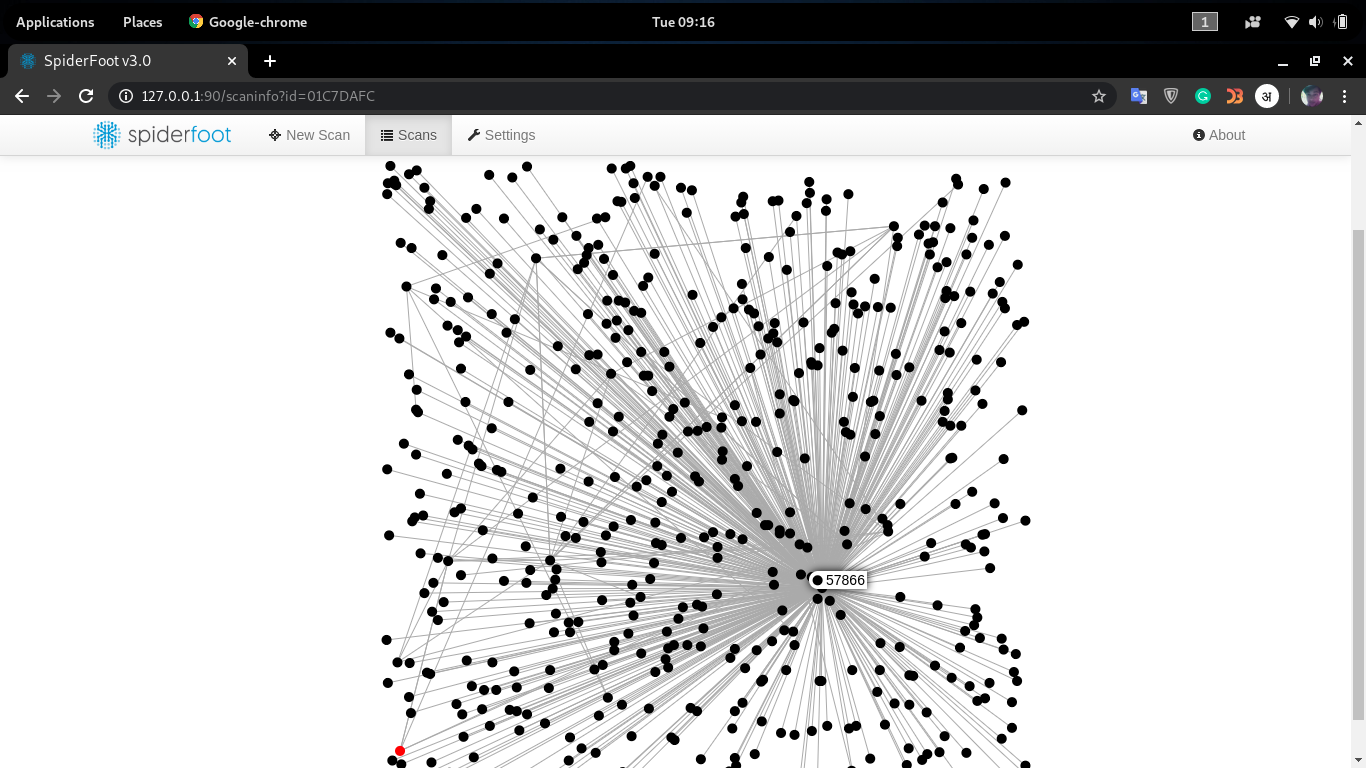
you can even see the graph of found information.
Screenshot:
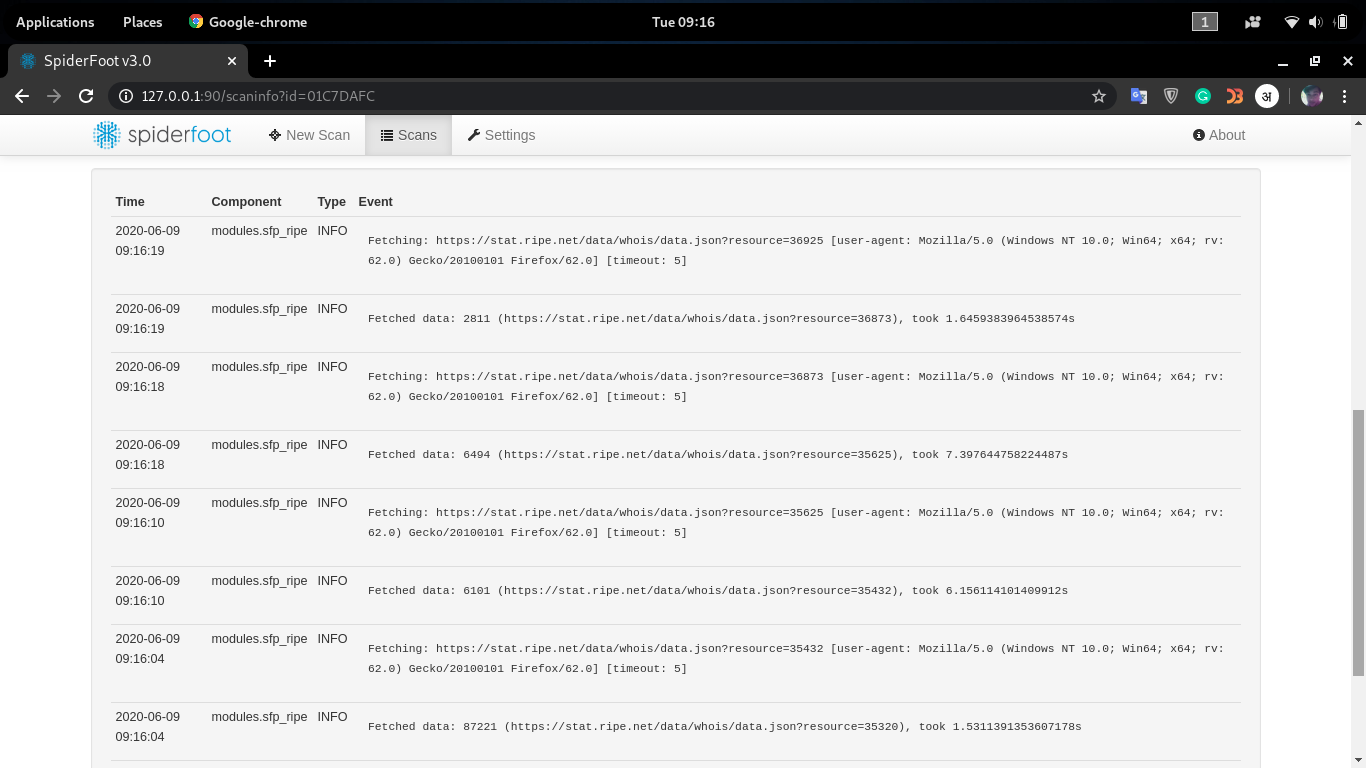
and when you will scroll down, you will see the module with the info it gathers.
Screenshot:
Thanks For Visiting.

")


")

