")
")


INTRO
I had an AWS account. well, I don’t have it now. but when I had it, I used to share files manually from my Linux to the AWS Cloud server sometimes. I had to forward the port to send the file always using Ngrok and other tools. I was repeating the process again and again which I don’t like. and it was the only reason I created this script. so that we can send and receive files from any Remote Server. you can learn more about port forwarding on our website. visit these links once if you haven’t before:
4. Netcat Tool
The last one is important to read. because I have used the Netcat tool in a part of the script to receive files. The rest of the links are related to port forwarding and necessary to be visited if you have no idea what port forwarding is.
SCRIPT
Have you ever used Ngrok before? It is a great tool to present yourself in the Internet world. it is a way to access your PC from anywhere. it makes your IP and your PC publicly accessible. You can even use this tool to send and receive files not only on a local area network but also anywhere on the internet.
Installation
Now let’s download the script. To use my script, go to my GitHub account Page.
⇒ github.com/luckythandel/luckyporter
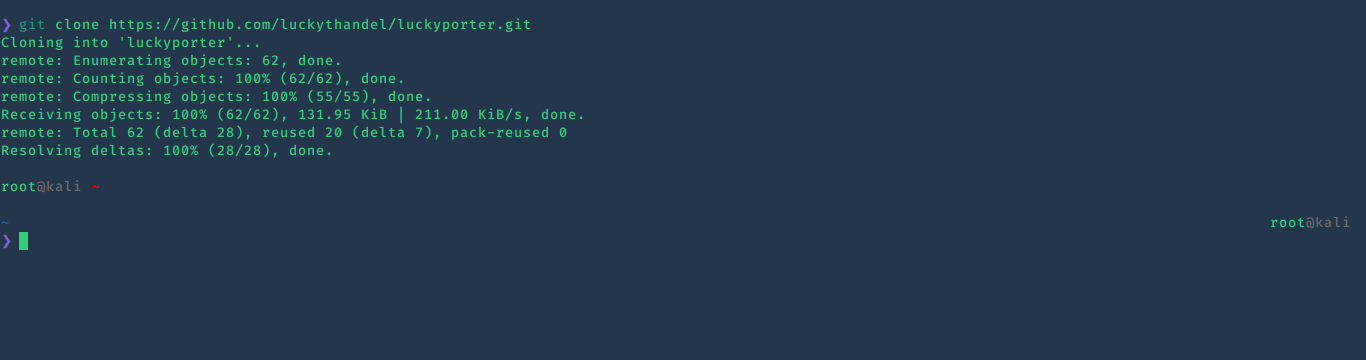
Type this command to clone it on your PC:
git clone https://github.com/luckythandel/luckyporter.git
Screenshot:
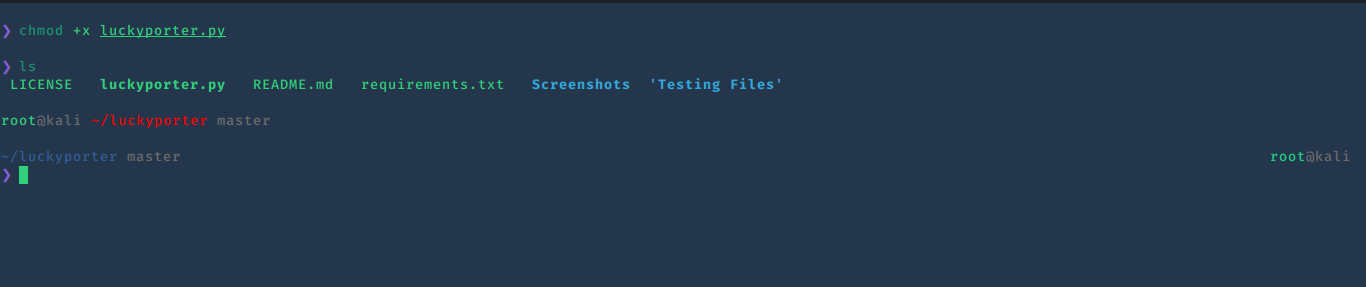
Go to the downloaded folder and make python file executable:
chmod +x luckyporter.py
Screenshot:
Now install all requirements which are necessary to run this tool using the requirements.txt file:
pip3 install -r requirements.txt
Before executing the script, I would like to suggest to install Ngrok binary file in /bin folder. Go to the Ngrok page: DOWNLOAD
Download the zip file and extract it into /bin folder. by the way, you can leave this step because the script will do this process itself.
Run
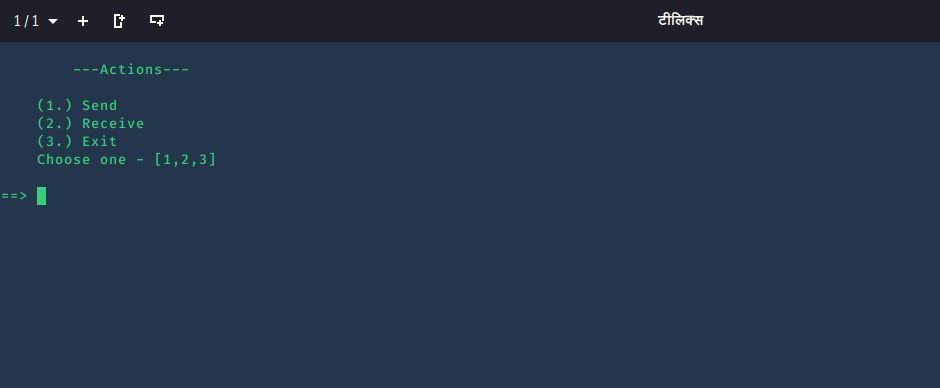
Now we are totally ready to run the script. simply run it with python3. type this command:
python3 luckyporter.py
Screenshot:
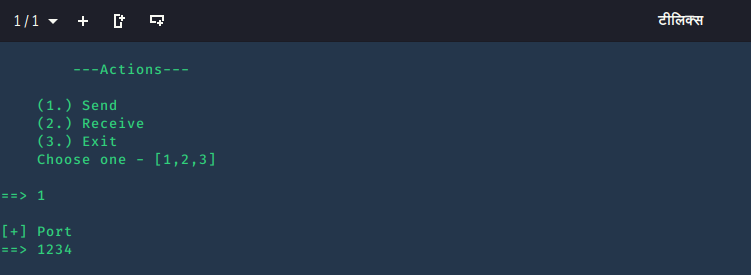
First, Let’s see how the Send function works. type 1 to choose send. After choosing to send it will ask for a port that is currently not working in any process in your system. it must be completely free. for example, the port 1234 is free is my system. so I will type 1234.
Screenshot:
Now it may install Ngrok. if you have skipped the last step in the installation. but if everything is Okay, it will ask for files. and the best thing is that you can use the <em>TAB</em> to view files and dirs. there is one more thing which makes this script extra-ordinary. you can choose more than one file at the same time. I will not show you here. I want you to explore this feature yourself.
Screenshot:
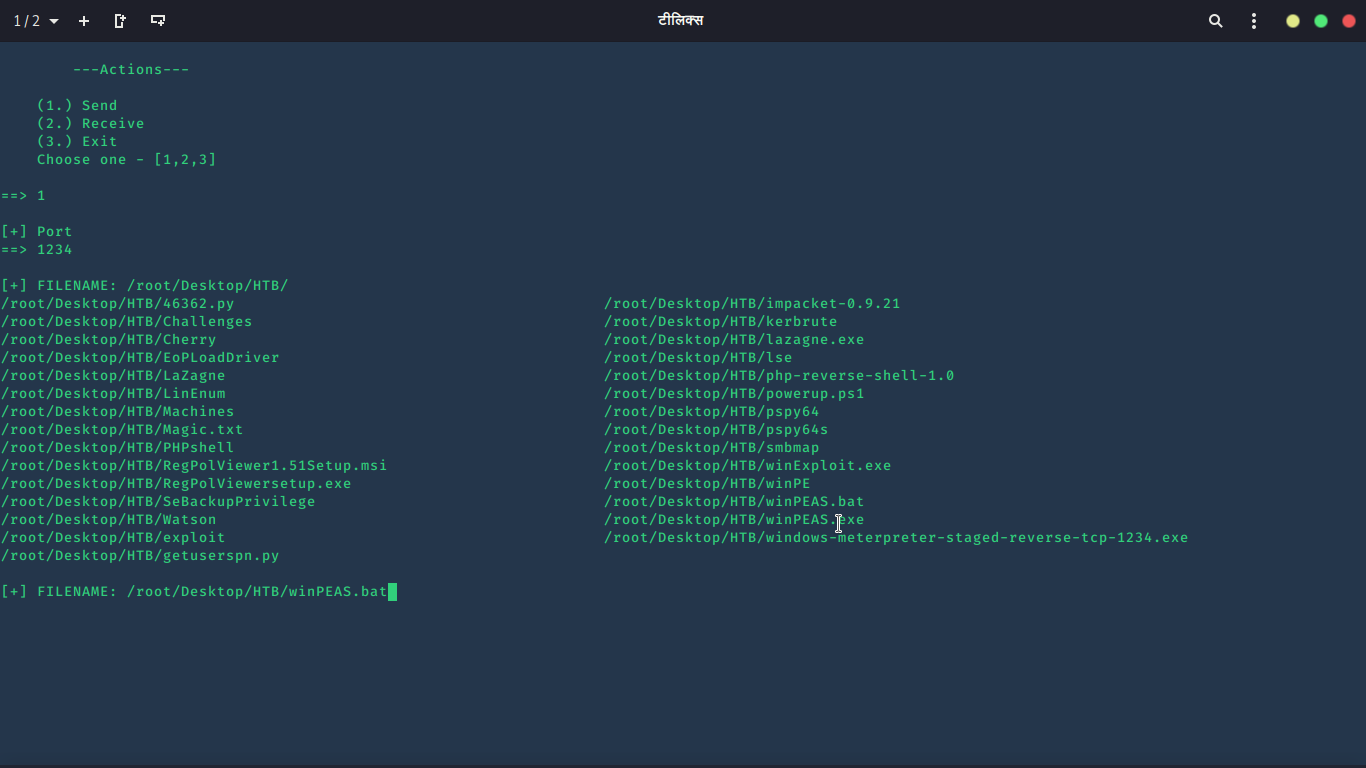
and click Enter. the script will show you what command to run on the Remote Server.
Screenshot:

The command in color blue is the file that we are supposed to run on the Remote Host. remember to press “q” to remove the file from the /var/www/htmldir.
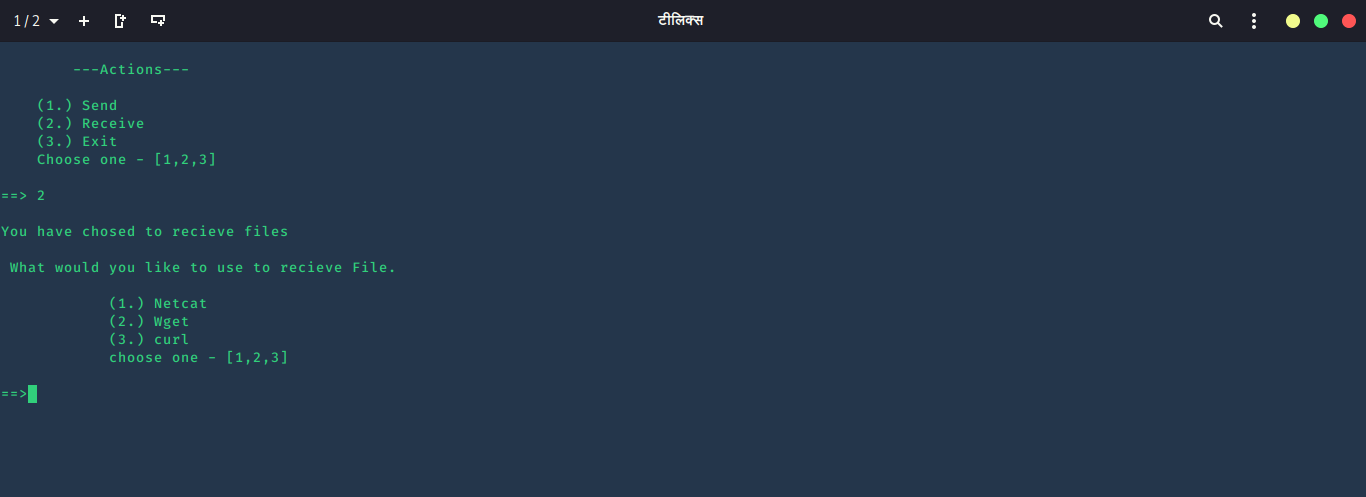
Now let’s take a look at the Receive function.
Choose 2 for Receive. it will ask you for a tool to use while receiving. Wget and Curl have are similar to each other. but the Netcat is a little bit different.
Screenshot:
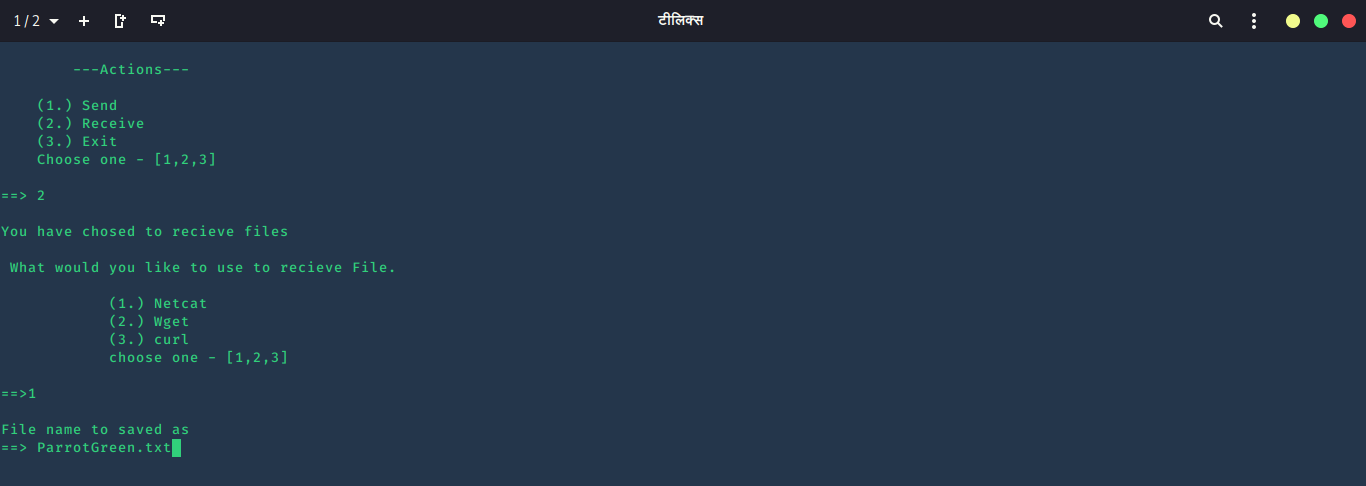
Choose 1 for Netcat. it will ask for a filename that will be saved as in your local System.
Screenshot:
After that, it will ask you for a Ngrok Token. Because TCP Port isn’t possible without Token in Ngrok tool. you can get your token by login into Ngrok.
Screenshot:

obviously, I won’t show you my Ngrok Token. and after entering the token, it will ask you for a port on which the Netcat listener will start. If you will run the Command which is in blue color, the Netcat will download this file.
Screenshot:

Wget and Curl are similar. honestly, I won’t ever use these. I would rather use those as a bash command than use it via this script. but I would love to see you explore these functions yourself.
Thanks For Visiting.

")


")

